Setting Up A Remarketing Campaign

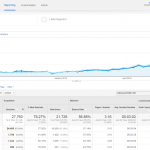
Remarketing is an Adwords feature that allows you to show ads to visitors after they visit your site via the display network. It is a simple yet brilliant marketing strategy, you can setup your audience lists according to certain goals (i.e. visitors who make it to the third step of your goal funnel but did not complete the conversion). Recently the Google Analytics Blog released a case study that showcases how an eCommerce store that sells watches earned a 1300% ROI using precision remarketing with Google Analytics, you can read that article by click here. Without going to far in to the technical details of how to setup a re-marketing, we are going to take you through the basics of how to setup a Re-marketing campaign and hopefully you can use this as a reference for setting up you first few campaigns.
How to setup a remarketing campaign
The first thing is first, you will need to have Google Analytics tracking enabled and you are going to have to add the Re-marketing code to your websites pages. Learning how to add the Google Analytics Re-marketing code to your website is very easy, To get the code, you will have to log into Google Adwords and create a new campaign. When you create the campaign ensure to select the campaign type that includes Re-marketing. After creating a campaign, the email that you use to log into Adwords should receive an email with the Re-marketing code, if you don’t get the email, you can follow the steps below to retrieve it:
1. Log into Adwords.
2. Open your “Shared library” which is found on the navigation on the left of your screen when logged into Adwords.
3. Click on “Audiences” then click on “tag details” at the top right of the audience screen.
4. After clicking on “View tag details”, click Setup.
5. Here you will have the option to click on “View remarketing tag & instructions”.
Verifying Proper Implementation & Collecting Your First Audience
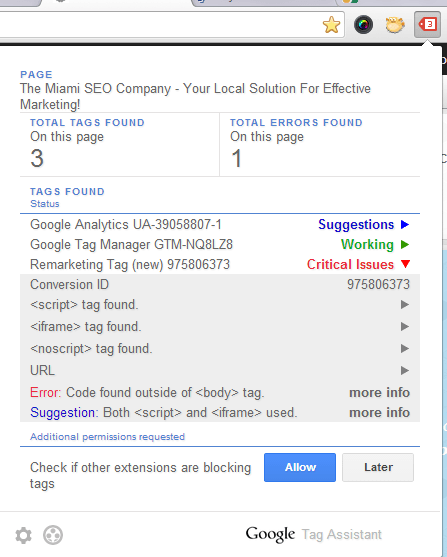
Installing the code is simple, simply add it to each page of your site in the <body> section. If you want to verify that you are using the tag correctly, you can use the Google Tag assistant extension for Google chrome and it will give you a message telling you what is wrong if it is not installed correctly as shown in the screen shot to the left.
As an eCommerce SEO company and service provider, its important to note that if you are selling products using the Google Shopping network you may want to consider dynamic Re-marketing. Dynamic Re-marketing allows you to show certain images and display ads that are releted to the products that visitors added to their shopping cart but then abandoned the funnel. For example, if a visitor found your auto part store and added a car battery to his shopping cart but then left your site because he was interrupted by a phone call and never made the purchase. With dynamic Re-marketing enabled, you can setup an audience for each product and show those visitors the product image on the Google Display network to increase your chances of having that visitor convert. Dynamic Re-marketing is literally the future of online marketing and it is making its impact in the modern age marketing world as one of the most lucrative forms of display network advertising.
Setting Up Your First Audience
Once you have the code added, you will need to collect an audience. Setting up a strategic Re-marketing audience can mean the difference between a very profitable campaign and a campaign that is a waste of time and money if you aren’t careful. Putting together an audience needs to be well thought out and you need to use as much data as you can to your advantage. Some of the popular methods of using Analytics data for Re-marketing involves analyzing the days to conversion report to see exactly how many days its taking visitor to convert after the first interaction with your website, re-marketing to those visitors can help you convert them at a higher rate. For the sake of keeping this blog post at a readable and not overwhelming to the novice word count, I am going to just cover how to setup a simple Re-audience. For more intricate audience list creation, i.e. dynamic Re-targeting with advanced audience lists click here.

Let’s assume for this example that you own a local service based business and you want to remarket to local visitors who spend a certain amount of time on your website and who visit 3 or more pages of your site. Setting up an audience like this is fairly simple, you will need to log into Google Analytics and navigate to the admin panel. Under the property section there is a Re-marketing button as shown below, when you click on that, “lists” opens up. Click that.
When you are prompted to the next screen, click on “create a new list”, like anything you will have to name it. Give it an appropriate name like “Local traffic +3 pages”, I say this because eventually you will have many Re-marketing lists and you will want to have an organized naming convention for them to keep your sanity. So, first things first, let’s setup our list to only capture local visitors, being that we are The Miami SEO Company, in our example we are going to filter only users from Miami, Florida. Below is a screen shot of what this setup looks like, keep in mind that every time you ad a filter, it will be added to the top right of the screen in your Analytics window.

So, now we have a filtered list that applies to only visitors from Miami but we need to also add a filter that captures only visitors that complete at least 3 unique page views which is a pretty simple task. To do so, we want to click on conditions first, then select unique page views as the filter selection. Since we want to target visitors who complete 3 or more page views we simply select the greater than or equal to sign and enter 3 in the input field for the value. An example of what this should look like is below for your reference. Notice again how Google stacks all of the filters that you have added on the right side of your screen to keep things organized? 🙂

Now that you have your filters setup, you also should make sure that you select which Adwords account you want to make this list available to. This portion of the list setup is towards the bottom on the page. If you don’t have your Analytics and Adwords account linked, you won’t see your Adwords account as on option on the drop down where you can select which Adwords account to share your list with so you will need to do that first. If you need to learn how to link your accounts see this Google Support page.
Setting up Your Remarketing Campaign in Adwords
Assuming that you have some general knowledge and experience with using Adwords, setting up a Remarketing campaign is not that difficult. There are a few things that you have to do to get your site and Adwords campaign ready for launch and I will cover them briefly in this post. Keep in mind that you can do MUCH MORE with Re-marketing than what I am about to cover, this is really intended for someone who is just looking to get started with their first Re-marketing campaign.
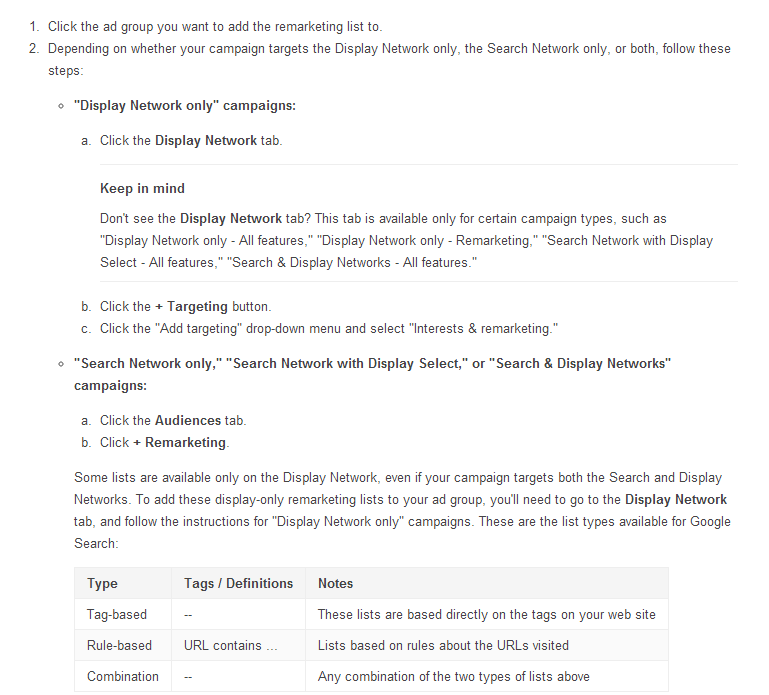
So first thing is first, you are going to want to do is add Re-marketing to one of your Adgroups. Simply log into your Adwords account (Re-marketing has to be enabled in your campaign) and click on the Ad group which you want to add your new Re-marketing list to. Now, depending on what you campaign settings are setup as you will have to follow the steps below:
The next thing you are going to want to do click on “Re-marketing Lists” and you will find the Re-marketing list that you created earlier on your screen. Click on the arrows to the right on the “Local +3 Pages” list that you created so that you can add this list to your Ad Group. Once you have your list ready, you just need to create the Ads that you want to use.
After you have your campaign setup, you will need to create Ads just like any Display campaign ad group requires. With Re-marketing you can create image ads and there are some policies that you have to adhere to as far as the images go which can be found here. Its best practice to try and use image ads that will appeal to the audience list you are using to help increase conversion rates. In the example we went over, since we are targeting visitors who visited 3 pages and are from Miami, it might be wise to offer a 10% discount to Miami residents or something along those lines. For eCommerce campaigns, you can create audiences for visitors that added a certain products to the shopping cart but did not convert. After the visitor abandons the funnel, you can show the same product on an image ad that would help bring the customer back to complete the conversion. These are just some of the techniques that can be used to increase profits from your Adwords campaign.
About The Author

Jason Hawkins / http://www.themiamiseocompany.com
Jason Hawkins is the CEO & Co-Founder of The Miami SEO Company. He has over ten years of experience in search engine optimization, conversion rate optimization and lead generation. His core responsibilities include identifying ways to increase value of services rendered, training staff on advanced SEO topics, and A/B testing internal processes to consistently improve client return on investment.